Recover deleted or formated data with PhotoRec
Last updated : 01/04/09
![]()
Accidents happen for example a Flash drive that might have been accidentally formatted or certain files erased from a hard drive. The good news is that as long as the data is not overwritten there is a high margin for a successful recovery. After all the recycle bin is not a secure way of destroying data by any standards. For this article I will be using PhotoRec by CG Security, Photorec has many advantages for example it’s open source, cross platform, configurable and is relatively light while operating. The entire operation will take some time depending in size of the drive to be inspected. Do not expect the files to recovered with the original file name, instead Photorec will assign them a number. The output data should be stored on a second drive, don’t even think about about using the same drive. The recovery technique I use is called Data Carving, I’ll let the collective knowledge explain what it means. Data Carving is a data recovery technique that allows for data with no file system allocation information to be extracted by identifying sectors and clusters belonging to the file. Data Carving usually searches through raw sectors looking for specific desired file signatures. The fact that there is no allocation information means that the investigator must specify a block size of data to carve out upon finding a matching file signature. This presents the challenge that the beginning of the file is still present and that there is (depending on how common the file signature is) a risk of many false hits. Also, data carving requires that the files recovered be located in sequential sectors (rather than fragmented) as there is no allocation information to point to fragmented file portions. This method can be time and resource intensive. Excerpt from Wikipedia
Download PhotoRec from CGSecurtity
PhotoRec is part of the TestDisk Suite. http://www.cgsecurity.org/wiki/PhotoRec
Step 1
After PhotoRec starts you will be presented with all the drives PhotoRec was able to detect. For demonstration purposes I will be using a 2 GB flash drive.
Disk /dev/sdb - 2097 MB / 1999 MiB (RO) - OCZ ET1208AD
And press enter to proceed. 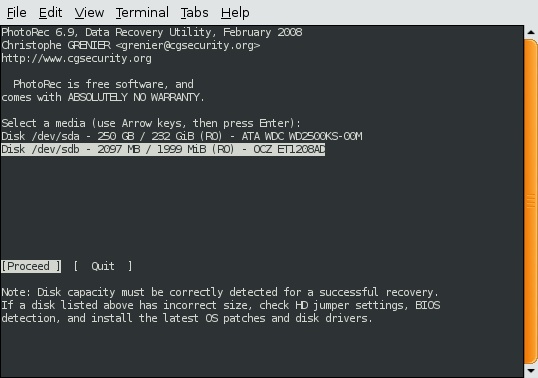
Step 2
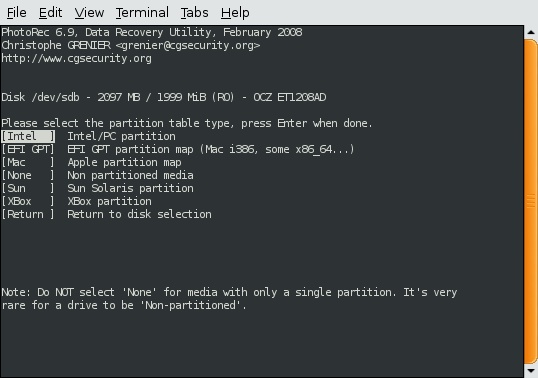
Select the partition table in my case it’s.
[ Intel ] intel/PC partition
Step 3
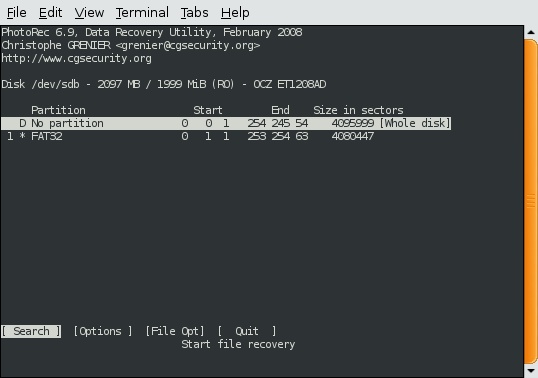
In this case I want to inspect the whole disk for data.
D No partition 0 0 1 254 245 54 4095999 [Whole disk]
Step 4
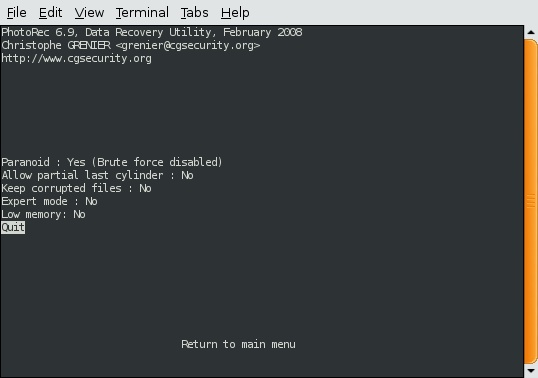
If you noticed in the bottom of the terminal you are also presented with the following options.
[Options] [File Opt]
You can select [Options] or [File Opt] to see the available file extensions that PhotoRec can recover, you can also unchecked the file extensions you don’t want to recover. Or configure how persistent PhotoRec should be. 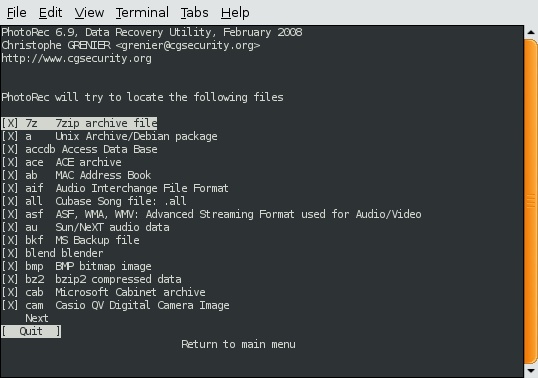
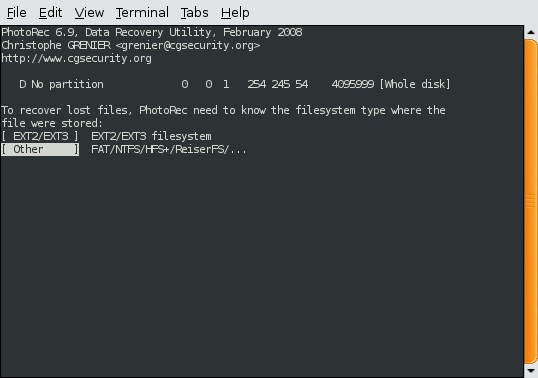
Step 5
Now specify the file system on which PhotoRec will attempt to recover the data from. My USB drive was formatted to FAT32.
[ Other ] FAT/NTFS/HFS+/ReiserFS/…
Step 6
PhotoRec is now presenting you with the option of choosing the default output directory /home/user or your own directory. You might want to create a directory just for the recovery which is usually spread across several directories. 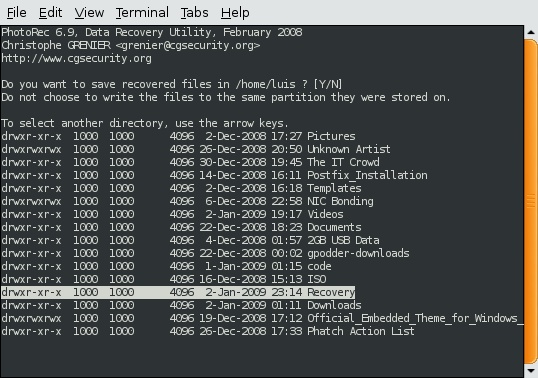
Step 7
After selecting the output directory the recovery process will start, PhotoRec will let you know of the remaining time and number of files found. 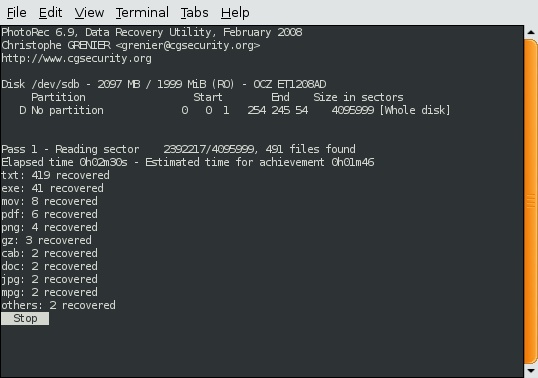 The recovery process is done. All recovered files are enumerated.
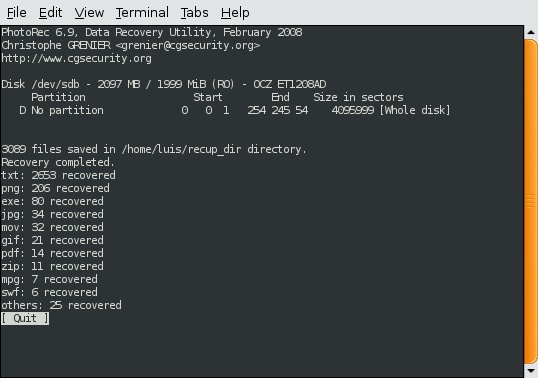
Output
Example of the recovery, all data is spread across multiple directories. The recovered files are renamed. 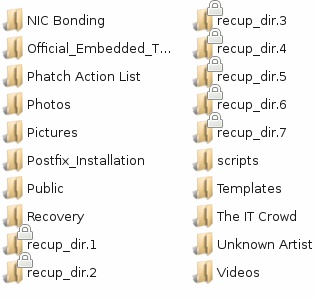
 Not all is lost sometimes most of the data can be recovered. Keep in mind some media files may be beyond recovery. Always back up your data and there will be no need for a recovery, otherwise I hope this article helps. http://en.wikipedia.org/wiki/Data_recovery
photorec, recovery — Jan 3, 2009