Nessus installation on Ubuntu
Nessus is one of the best vulnerability scanners out there and works on all major platforms. If you care about the security of the network then you should take a proactive mindset to defend from possible attacks. This is a guide on how to install Nessus the client and server on Ubuntu Linux, no explanation on how to use Nessus is given (sorry). The steps are similar for other Linux distributions (adapt), the major difference is that in this tutorial I use apt-get to install Nessus. 
Nessus installation
Start by installing Nessus client and server which are required to have a functional Nessus installation. Do not worry about creating certificates the installation automatically takes care of that.
sudo apt-get install nessusd nessus nessus-plugins
New user configuration
That was easy!. Before we can start using Nessus its required that you create a new user for Nessus.
sudo nessus-adduser
In a multi-user environment you might want to add some restrictions on what the users can do. In this occasion I do not want any restrictions on what Nessus can do. Provide a username and password.
Add a new nessusd user
Login : (my_nessus_username)
Authentication (pass/cert) [pass] : (press_enter_to_use_a_password)
Login password : (provide_a_password_for_the_username)
Login password (again) : (confirm_the_password)
I recommend you do not place any restrictions on what the new Nessus user can do, hit Ctrl + D. Then you will be asked to confirm the given user information by pressing y.
User rules
nessusd has a rules system which allows you to restrict the hosts
that user_name has the right to test. For instance, you may want
him to be able to scan his own host only.
Please see the nessus-adduser(8) man page for the rules syntax
Enter the rules for this user, and hit ctrl-D once you are done :
(the user can have an empty rules set)
Login : my_nessus_username
Password : ***********
DN :
Rules :
Is that ok ? (y/n) [y] y
user added.
Now Nessus has a user to work with, lets start Nessus.
sudo /etc/init.d/nessusd start
Nessus registration
Nessus works without registration, but it is highly recommended that you register the installation with Tenable Network Security to keep the Nessus plugins up-to-date. The vulnerabilities plugins on a unregistered installation may become obsolete, which will lead you to think there are no vulnerabilities on the network. Visit the following link to read and accept the Tenable Network Security agreement and provide them with an email address where they can send you a registration key for the Nessus installation. We will use the key in a moment. Tenable Network Security (Nessus) registration page Copy the registration key. In the email you are given instruction on how to use the registration key. However the path given on the instructions will not work on Debian based distributions like Ubuntu, we just need to make a small change on the path. Instead of the orignal path /opt/nessus/bin/nessus-fetch use the correct path /usr/bin/nessus-fetch. Replace xxxx with the registration key.
sudo /usr/bin/nessus-fetch –register xxxx-xxxx-xxxx-xxxx-xxxx
xxxx-xxxx-xxxx-xxxx-xxxx - is the 20 character registration key. And this is how the actual registration looks like.
user@desktop:~$ sudo /usr/bin/nessus-fetch –register 2BH5-SF95-L1IA-8E17-CR5C
Your activation code has been registered properly - thank you.
Now fetching the newest plugin set from plugins.nessus.org…
W: Cannot find a running instance of Nessus, did not find /var/run/nessusd.pid
Your Nessus installation is now up-to-date.
Make sure to call regularly use the command ‘nessus-update-plugins’ to stay up-to-date
To automate the update process, please visit
Update Nessus Plugins
sudo nessus-update-plugins
You can launch Nessus from Applications > Internet > Nessus. 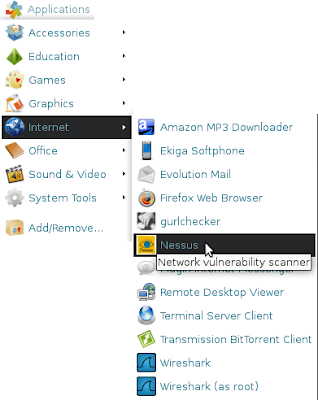 Nessus is useful for automatic network vulnerability identification, but will not replace a careful administrator in the first place.