How to mount an ISO on VMware Player
VMware Player as the name suggest is meant to play or run virtual machines that were made on another VMware product, such as VMware Workstation. Asides from playing virtual machines you can also change the amount of allocated RAM. And that’s where the features end. It took me a while to figure out that VMware Player has the built-in ability to mount an ISO image. This is a nice feature if you wish to install an operating system on a virtual machine or want to try an ISO without having to burn it into a CD/DVD. No need to modify the configuration file.
In case you need to blank virtual machine you can download one from this link, unzip and open it with VMware Player.
How To
Start an existing virtual machine or a blank virtual machine with VMware Player and on the top left click on Devices > CD/DVD (IDE) and click on Disconnect. This will cause the virtual CD/DVD drive to be disconnected. 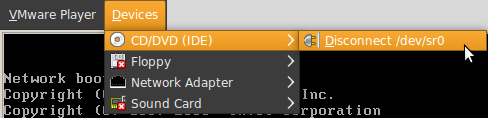 Go back to Devices > CD/DVD (IDE) > Connect to Disk Image File (iso).
 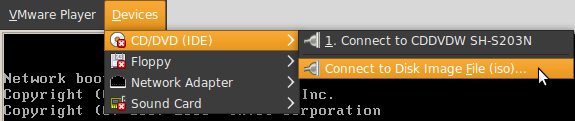 A new window will open where you can browse and select the ISO. Double click on the ISO to selected.
  If you go back to Devices > CD/DVD (IDE) you will see that the ISO image has been mounted. Do not click on Disconnect.
  Now head over to VMware Player > Troubleshoot > Reset. This will restart the virtual machine.
 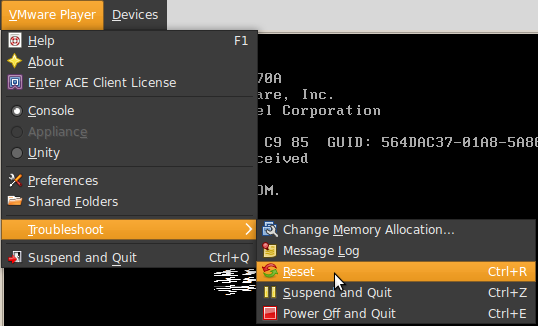 Wait for the virtual machine to boot and congratulations.
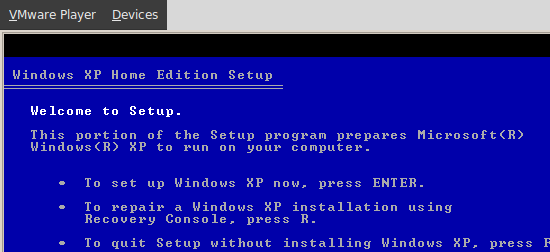
Unmount the ISO
Once you are done using the ISO the process to unmounted it is similar. Go to Devices > CD/DVD (IDE) and click on Disconnect /home/luis/windowsXPPRO.iso. This will tell the ISO image to unmount. 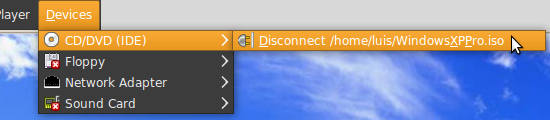 Go back to Devices > CD/DVD (IDE) and click on Connect to CDDVDW SH-S203N. This will cause the CD/DVD drive to reconnect.
 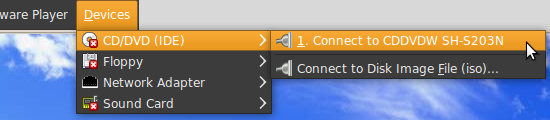 To verify if the CD/DVD drive is functional go to Devices > CD/DVD (IDE), do not click on Disconnect.
 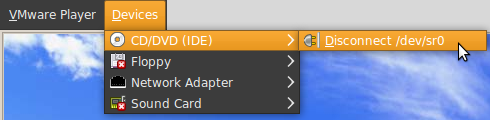 Congratulations you have now successfully mounted and unmounted and ISO on VMware Player.