Not knowing what is going on a server can be a recipe for disaster. That’s why I use Munin a networked resource monitoring tool that is both simple to install and understand. Munin graphs server performance over time, administrators can later use this information to make an informed decision about when to add more resources.
From The Munin Site:
Munin is a networked resource monitoring tool that can help analyze resource trends and “what just happened to kill our performance?” problems. It is designed to be very plug and play. A default installation provides a lot of graphs with almost no work.
Note: You will need Root privileges
Why guess when the right tools are available.
Install
To start this tutorial you will need a web server, both Lighttpd and Apache will do the job. For this tutorial I will use Lighttpd which is available from the Ubuntu Repositories.
sudo aptitude install lighttpd
You will also need PHP installed on the system.
sudo aptitude install php5-cgi
Since Munin will be running on only one system we will need the master and client installed on the same system.
sudo aptitude install munin munin-node
Configure
When the installation in complete, open the Munin configuration file with your text editor of choice. Change the htmldir path from /var/cache/munin/www to /var/www/munin.
sudo nano /etc/munin/munin.conf
dbdir /var/lib/munin htmldir /var/cache/munin/www logdir /var/log/munin rundir /var/run/munin
New Path.
htmldir /var/www/munin
When Munin is installed in Ubuntu 10.04 the htmldir path changes for some reason. To have a functional installation we had to change the path on the configuration file, now we need to move the Munin directory out of /var/cache/munin/www into /var/www/munin with the help of the mv command.
sudo mv /var/cache/munin/www/ /var/www/munin
Assign the Munin directory to the Munin user and group by using chown.
sudo chown munin.munin -R /var/www/munin
And now you can start Munin.
sudo /etc/init.d/munin-node start
Munin can be accessed by pointing the web browser to:
http://your-ip.com/munin
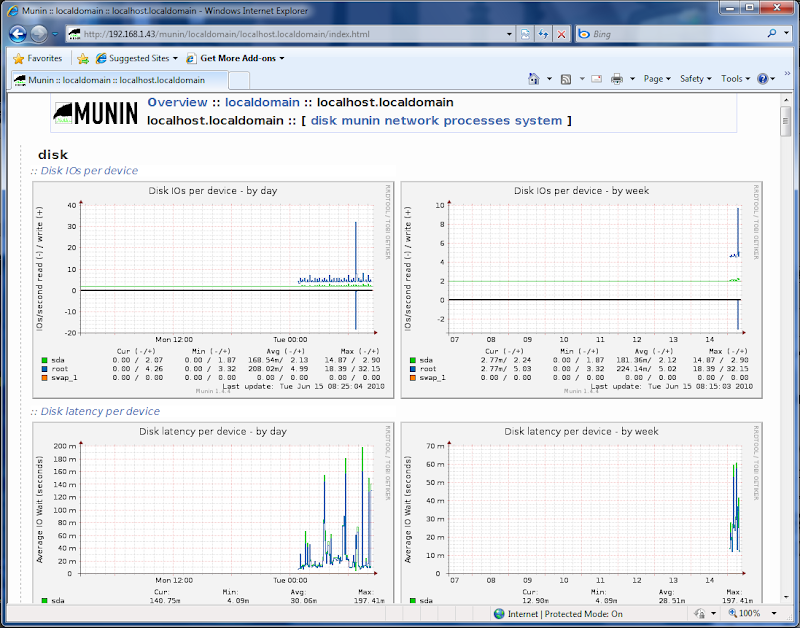
Remember that it will take a long time for Munin to display any meaningful information, be patient.


June 20, 2010 at 10:07 am
Hi,
It is as easy as reading
. Thanks. Bdw, there is typo.
+++
sudo aptitude installl munin munin-node
+++
I know you will find it
June 20, 2010 at 4:10 pm
Hardik Dalwadi thank you for pointing out the typo.
September 23, 2010 at 4:07 pm
i have a problem, at the end i have an error,
sudo /etc/init.d/munin-mode start
sudo: /etc/init.d/munin-mode: command not found
whats wrong????
September 23, 2010 at 4:18 pm
sorry, i found the error, now i know what is a “typo”
but i have another error, i cant open the munin page,
i write my ip: 192.168.2.100/munin
and the browser says:
Not Found
The requested URL /munin was not found on this server.
Apache/2.2.14 (Ubuntu) Server at localhost Port 80
September 23, 2010 at 7:38 pm
comah@ let me apologize munin-mode is a typo, the correct command is sudo /etc/init.d/munin-node start
Did you assign the Munin directory to the Munin user, have you restarted the service ?
October 1, 2010 at 6:53 am
Hello,
just my 0.02€ :
if you use apache2 then install munin, it creates a link /etc/apache2/conf.d/munin to /etc/munin/apache.conf
in which you have an alias which makes /var/www/munin pointing to /var/cache/munin/www
so accessing via your browser to http://yourmachine/munin just works, without having to mv the htmldir /var/cache/munin/www to /var/www/munin
*But* you need to modify the /etc/munin/apache.conf so that it accepts requests :
Allow from localhost 127.0.0.0/8 ::1
can be changed to
Allow from all
(or something more restrictive)
otherwise you will have a 403 : access denied
hope it helps
February 3, 2011 at 4:09 pm
You don’t need to
sudo aptitude install php5-cgi. munin is written in perl, any missing dependencies will be worked out and installed when yousudo aptitude installl munin munin-nodeFebruary 17, 2011 at 8:52 pm
In my experience with this tutorial only two problems were encountered. I had to add in the /etc/apache2/apache2.conf file the statement:
Include /etc/apache2/conf.d/munin
I also had to manually edit within the /etc/apache2/conf.d/munin file to change this:
Alias /munin /var/cache/munin/www
to this:
Alias /munin /var/www/munin
Otherwise, everything else was as advertised. Quick tutorial with no fluff! Thanks.
October 13, 2011 at 5:31 pm
Moving a directory set by an official package is considered very bad practice: you break the packaging, which will prevent it to be uninstalled or upgraded correctly, so it is something you just don’t do if you have more than one server and don’t want to spend your life maintaining them while you could be out there in the sun.
Instead, as suggested by papy, enjoy the pre-packaging of apache and configure lighttpd quickly so it can find the munin directory where it is instead of looking for it elsewhere:
$ sudo vim /etc/lighttpd/lighttpd.conf
$HTTP["remoteip"] =~ “127.0.0.1″ {
alias.url += (
“/munin/” => “/var/cache/munin/www/”,
)
}
Reload lighttpd: $ sudo service lighttpd force-reload
Then load http://localhost/munin/ and you’re done.
That’s if you want to use lighttpd of course, because if you use Apache (heavier), you’re ready faster (on Ubuntu 10.04).
January 27, 2012 at 11:54 am
Thanks Munin installation working in 7 minutes
May 16, 2012 at 4:35 pm
Thank’s to Sn3akyP3t3!
The suggested fix works
Bye
Alberto Drago