Windows Server Backup - Part 1
Windows Server 2008 features a native backup solution called Windows Server Backup. Has expected Windows Server backup is a simple backup solution, by simple I mean the administrator has few backup options. If you are on a tight budget Windows Server Backup might be the solution.
Windows Server Backup limitations:
- It can only backup entire volumes, backing up a specific directory is not an option
- Only two types of backups are supported: full and incremental
- Windows Server Backup lacks the ability to backup to Tape
Windows Server Backup benefits:
- No cost solution
- Simple to implement and administer
- Makes use of VSS
Install Windows Server Backup
Go to Start > Server Manager > Features Summary > Add Features. 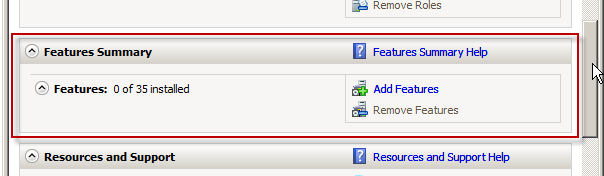 Search for Windows Server Backup Features and check the box to install this feature > Click on Next > Click on Install.
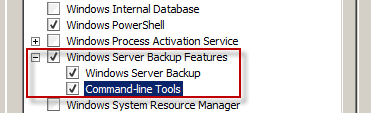
First Time Configuration
To begin the backup process for the first time go to Start > Administrative Tools > Windows Server Backup. To schedule a backup for the first time click on Backup Schedule. 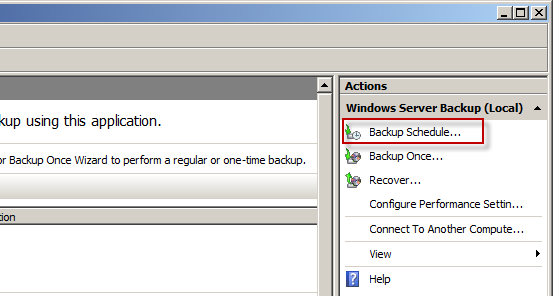 In the Backup Schedule Wizard window click on Next to continue. This is when you decide which volume or volumes you want to backup, if you wish to remove a volume from the backup schedule select Custom otherwise select Full Server (recommended) and click on Next.
 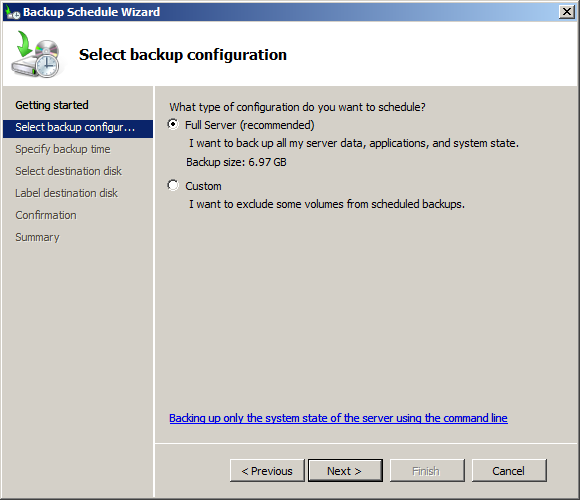 Ideally you want to run backups during hours when the load is going to be minimal on the server, running a backup during business hours could cause slow downs. Click on Next after you select the time.
 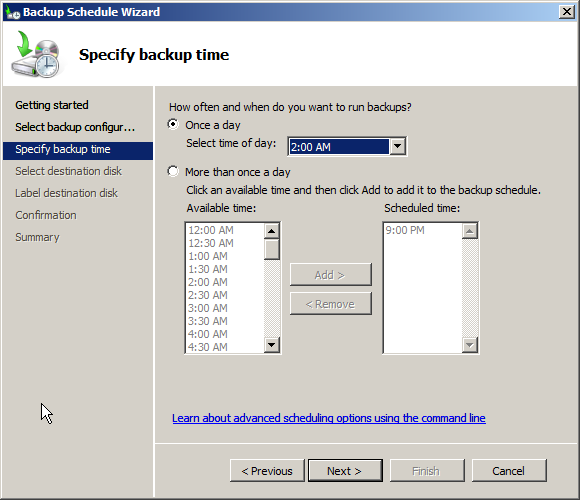 Click on Show All Available Disks…
 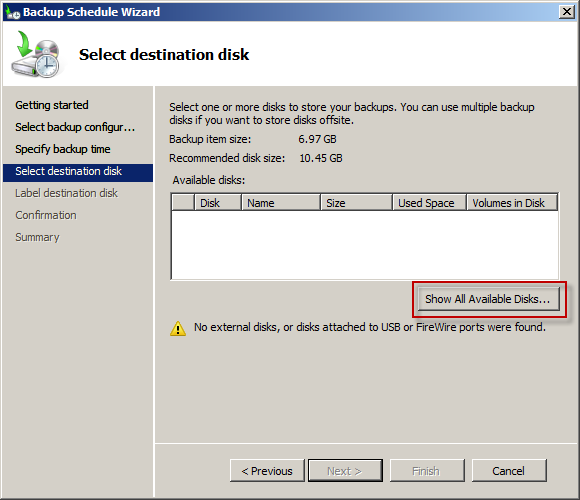 The disk being displayed is where the backups will be stored to, select carefully. And click on OK.
 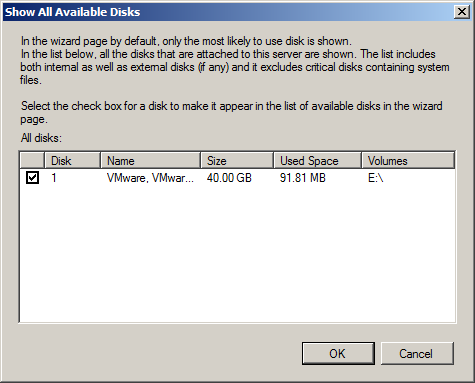 Once again confirm the selected disk by checking the box corresponding to the drive you wish to backup to. And click on Next.
  Windows Server Backup requires a dedicated drive, the seleted backup drive will be re-formated. This mean all the data in the drive will be removed. Click on Yes to continue.
 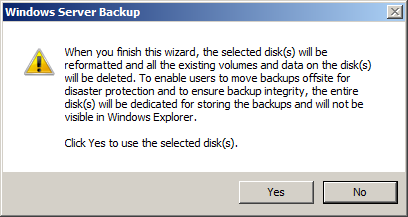 Take note of the label that was assigned to the backup drive. You might needed later in order to know which backup drive contains the backup volume you wish to recover. Click on Next to continue.
 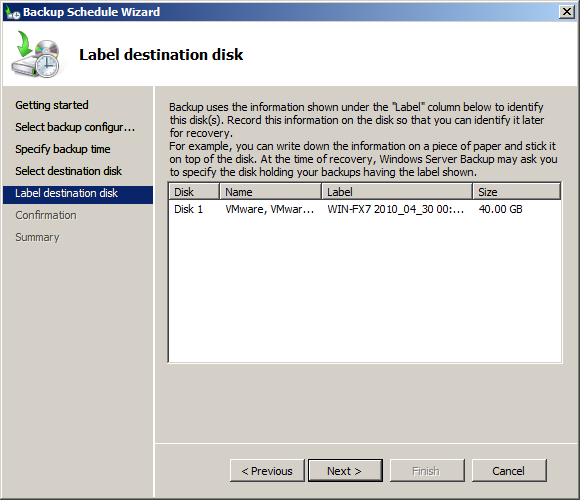 Review this window before clicking on Finish to start the process.
 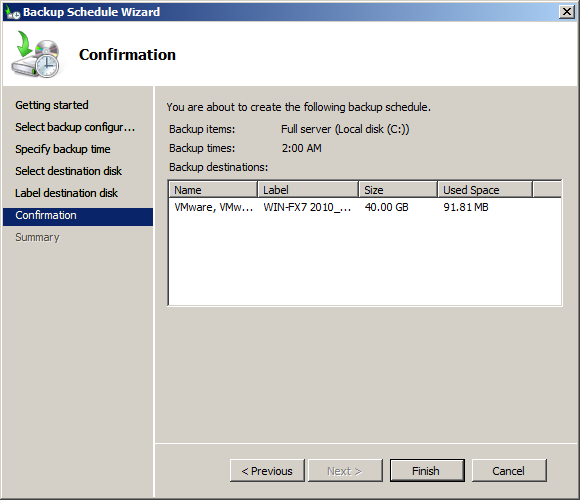 Once you click on Finish the formatting process and backup schedule process will be started.
 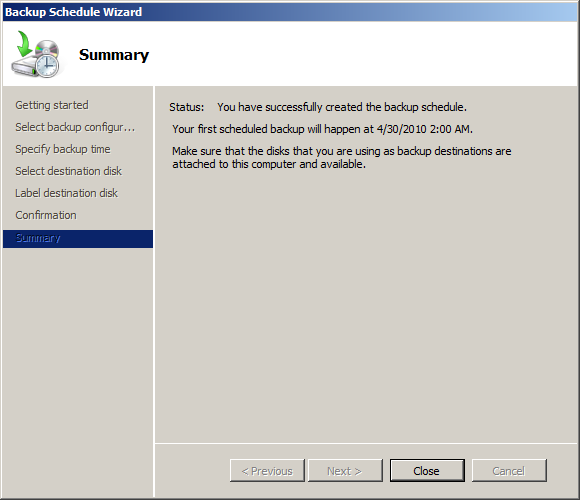 You can go one step further by modifying the type of backups you wish to make on the system. Options include Full Backup and Incremental Backup. To change this setting click on Configure Performance Settings…
 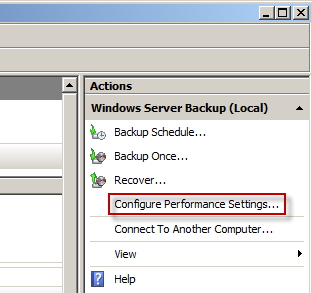 Change this setting according to your needs.
  Now that you have configured the backup schedule all you have to is wait for the backup to be executed at the specified time. Congratulations, you have just configured Windows Server Backup on your Windows system. Hopefully the steps outlined in this tutorial made it clear how easy Windows Server backup is to configure and implement as a backup tool.
 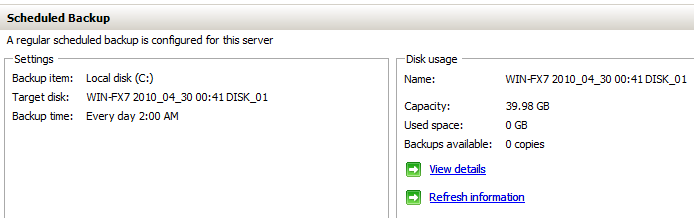 Part 2 - Coming soon………………………
backup, windows server 2008, windows server backup — May 3, 2010